RV Solar System Sizing: Get Your Exact Wattage in 4 Steps
By Smart RV Hub Team · 15 min read
What you'll discover
- How to calculate your daily power consumption
- The right battery capacity for your usage level
- How to size your solar panels and charge controller
- How to size your inverter for AC loads
- What a complete system costs at every budget level
- Common sizing mistakes and how to avoid them
- Real sizing examples from minimal to full timer setups
Affiliate Disclosure
Smart RV Hub may earn a commission if you purchase from A1 SolarStore through these links, at no additional cost to you; see our full disclosure.
What size solar do you need?
Pick how you camp to see a starting array size from the guidance on this page.
Suggested starting array
400 to 600W
Running a fridge and laptops.
A starting point only. Your exact size depends on your daily watt hours, so use the sizing steps on this page to dial it in.
See matching panels at A1 SolarStoreAffiliate link. We may earn a commission if you buy, at no extra cost to you.
Trust signals verified October 2026.
Want This Starting Point in Writing?
Your starting point: 400 to 600W for a part time traveler.
Send yourself this sizing starting point along with wiring and install guidance.
No spam, and you can unsubscribe anytime. See our Privacy Policy.
Why Getting the Size Right Matters
Too little solar and you wake up to dead batteries. Too much and you've spent thousands on panels that spend most of the day throttled by a full battery bank.
The right system is the smallest one that comfortably covers your actual daily usage. That number is different for every RV, which is why a quick calculation beats guessing every time.
Ships fast to get you camping sooner
Rated 4.5 of 5 on Trustpilot, checked October 2026 (opens in a new tab)Fast US shipping. Other trust signals verified October 2026.
Shop RV Solar Panels and BatteriesAffiliate link. We may earn a commission at no extra cost to you.
Know your wattage already?
Once you have your number, price the panels, controller and battery at A1 SolarStore, which ships from multiple US warehouses and takes sizing questions by phone.
How Many Solar Panels Do You Need for an RV?
Most RVs need between one and four panels, and the appliance list decides it rather than the size of the rig.
Based on published fridge draw specs, 400W of panel is a common build, because it covers a compressor fridge with room to spare.
A weekend camper with lights, a pump and device charging runs happily on a single 200W panel, based on published draw figures for those loads.
Full time travelers with a residential fridge usually need three or four panels, which is 600W to 800W.
Anyone planning to run air conditioning should treat shore power or a generator as part of the plan, because that one appliance changes the whole electrical system.
The four steps below turn that rough answer into a figure sized from your own daily watt hours.
How to Size an RV Solar System in 4 Steps
Work through these four steps to calculate the right battery capacity, solar panel wattage, and charge controller for your RV.
Step 1: Calculate Your Daily Power Consumption
List every device you use and estimate daily run time.
Multiply watts by hours for watt hours (Wh).
Then add them up.
| Appliance | Typical Draw | Example Daily Use | Daily Wh |
|---|---|---|---|
| 12V compressor fridge | 40 to 80W | 24 hrs, cycling | 300 to 600Wh |
| LED lights | 10 to 20W | 4 hrs | 40 to 80Wh |
| Laptop | 60W | 4 hrs | 240Wh |
| Phone charger | 10W | 2 hrs | 20Wh |
| Fan (12V) | 20 to 40W | 8 hrs | 160 to 320Wh |
| TV (small) | 30 to 60W | 3 hrs | 90 to 180Wh |
| Water pump | 60W | 0.5 hrs | 30Wh |
| Coffee maker | 600 to 900W | 0.25 hrs | 150 to 225Wh |
| CPAP machine | 30 to 60W | 8 hrs | 240 to 480Wh |
| Starlink Standard | 75 to 100W | 8 hrs | 600 to 800Wh |
| Starlink Mini | 20 to 40W | 8 hrs | 160 to 320Wh |
| Hair dryer | 1,200 to 1,800W | 0.15 hrs | 180 to 270Wh |
| Microwave | 1,000 to 1,500W | 0.25 hrs | 250 to 375Wh |
| Instant Pot | 700 to 1,000W | 0.5 hrs | 350 to 500Wh |
| Electric blanket | 200W | 8 hrs | 1,600Wh |
A compressor fridge cycles on and off, so as a rough guide its daily total sits far below its draw times 24 hours. Starlink figures are the average power ranges on Starlink's Standard and Mini specification sheets, read October 2026.
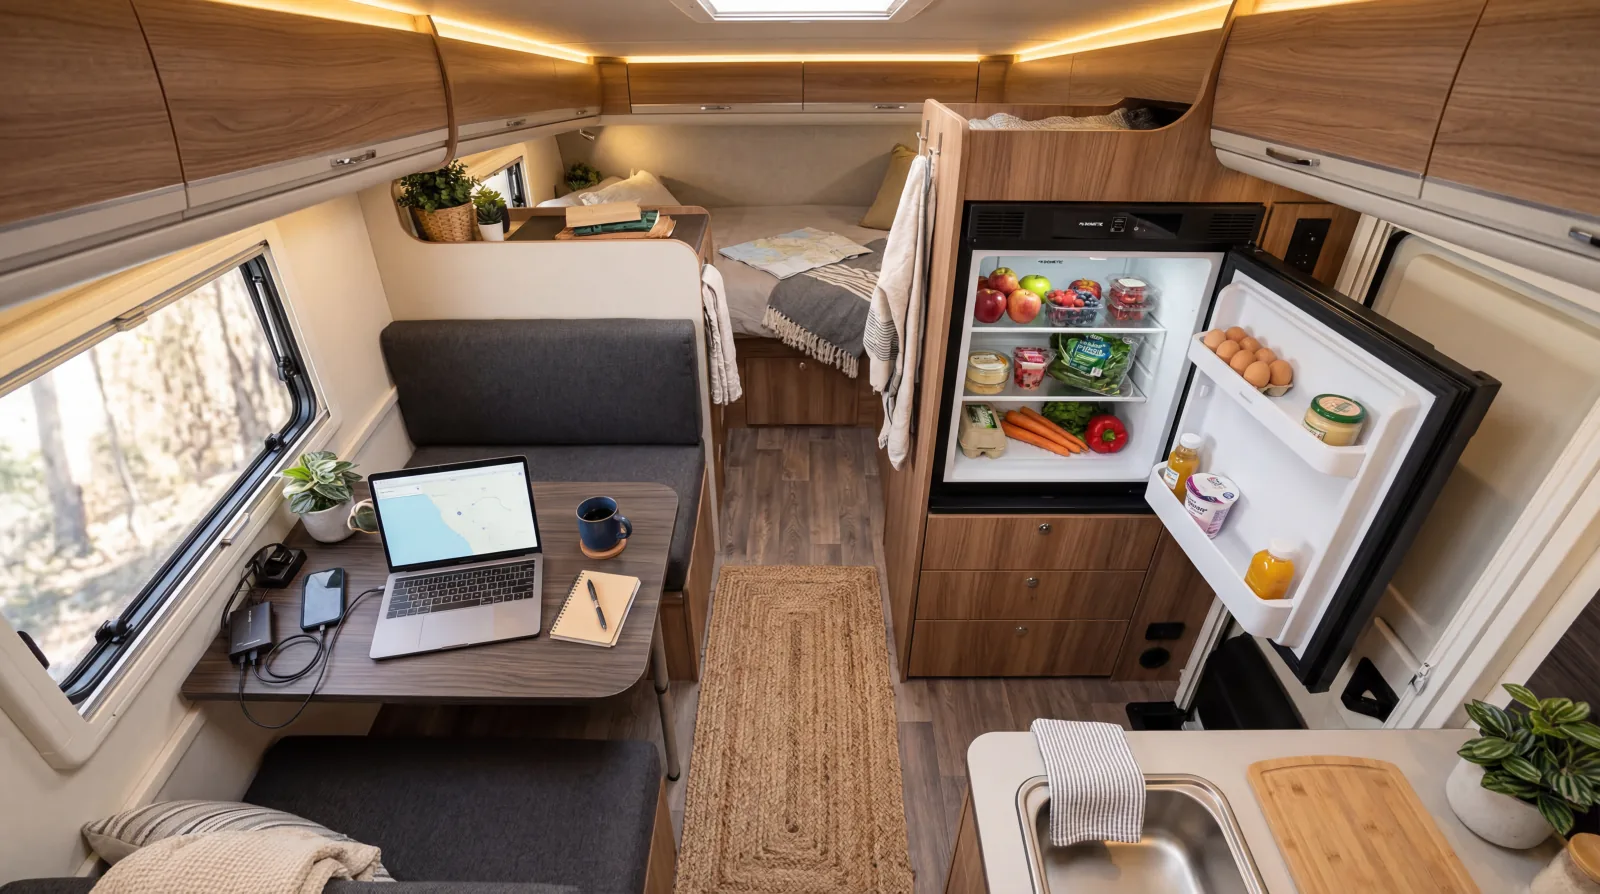
Add your totals. A moderate setup running a fridge, fan, lights, and a laptop lands around 750 to 1,250Wh per day.
Step 2: Determine Battery Capacity
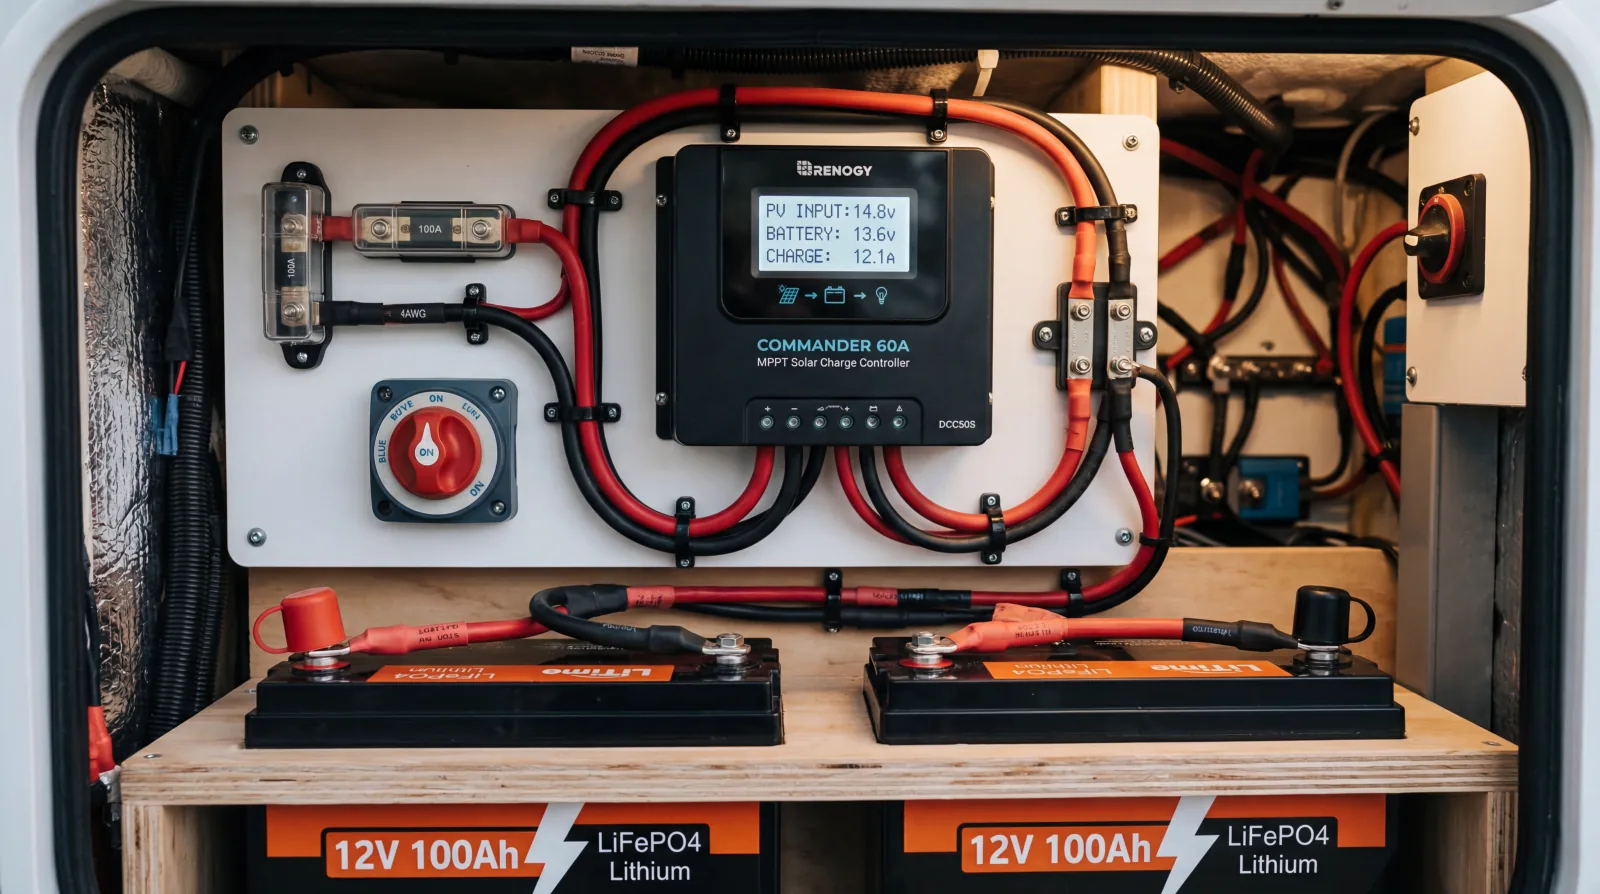
Batteries are rated in amp hours (Ah), but you can't use all of that capacity without damage.
Lithium (LiFePO4) is safe to 80% depth of discharge (DoD).
AGM should stay at 50%.
Formula: Daily Wh ÷ DoD ÷ 12V = battery Ah needed
Example: 1,500Wh ÷ 0.8 ÷ 12 = 156Ah lithium (or 250Ah AGM at 50% DoD).
For a deeper look at battery chemistry and sizing, see what separates lithium from lead acid in practice.
Narrowing down brands? Our comparison of how Renogy and Battle Born lithium banks stack up covers the two names most builders shortlist.
Step 3: Calculate Solar Panel Wattage
Panels only produce full rated watts under ideal lab conditions.
Real world output is lower due to shading, heat, and angle.
Use an 85% efficiency factor.
Formula: Daily Wh ÷ peak sun hours ÷ 0.85 = panel watts needed
For example, assume 5 peak sun hours: 1,500Wh ÷ 5 ÷ 0.85 = 353W of panels. Round up to 400W to give yourself a buffer.
Peak sun hours average 4 to 6 in most of the US, according to NREL solar resource data.
Desert Southwest gets 6+; Pacific Northwest averages closer to 4.
Use your most common camping region as your baseline.
If the math lands near the middle of the range, see how a 600 watt system performs day to day before you settle on a panel count.
Ready to shop? Compare options in our Best RV Solar Panels guide.
Step 4: Choose Your Charge Controller
The charge controller sits between your panels and batteries. Its amp rating must handle your panel output, plus a 25% safety margin for future expansion.
Most buyers choose an MPPT controller, short for maximum power point tracking. It constantly adjusts itself to pull more usable power from your panels than the older PWM type.
Formula: Panel watts ÷ battery voltage × 1.25 = minimum controller amps
Example: 400W ÷ 12V × 1.25 = 41.7A. A 50A or 60A MPPT controller is the right call here.
MPPT controllers are worth the extra cost for systems over 200W. They recover 15 to 30% more power in low light conditions.
See our MPPT vs. PWM comparison for the full breakdown.
You Have Your Number. Which Build Fits It?
The four steps above gave you a panel wattage, a battery capacity, and a controller amp rating.
Find your panel wattage in the first column to see the complete build it matches.
| Your panel total | Battery | Controller | Build |
|---|---|---|---|
| Around 100W | 50Ah LiFePO4 | 20A MPPT | Minimal |
| Around 400W | 200Ah LiFePO4 | 50A MPPT | Moderate |
| Around 800W | 400Ah LiFePO4 | 100A MPPT | Full timer |
Daily power use, suited traveler, and installed cost for all three sit in the three worked builds further down.
A1 SolarStore sells panels from about 355W up, charge controllers and batteries as separate parts, so the 400W build there is one 400W class panel and the 800W build is two.
Ships fast to get you camping sooner
Rated 4.5 of 5 on Trustpilot, checked October 2026 (opens in a new tab)Fast US shipping. Other trust signals verified October 2026.
Shop RV Solar Panels and BatteriesAffiliate link. We may earn a commission at no extra cost to you.
How Does Season Affect RV Solar Sizing?
Winter solar production drops to 50 to 70% of summer output, even in sunny states. Shorter days, lower sun angles, and more overcast weather all cut into your daily harvest.
If you camp in winter, oversize your panel array by 30 to 50% beyond your summer calculation. That buffer keeps batteries topped off even on short December days.
Peak Sun Hours by Region
| Region | Avg. Peak Sun Hours | Winter Impact |
|---|---|---|
| Desert Southwest (AZ, NM, NV) | 5.5 to 7+ | Mild, best winter camping |
| Southeast (FL, TX, GA) | 4.5 to 5.5 | Moderate, good year round |
| Midwest (KS, MO, IL) | 4 to 5 | Significant, add 30% panels |
| Pacific Northwest (WA, OR) | 3 to 4 | Severe, add 40 to 50% panels |
| Northeast (NY, ME, VT) | 3.5 to 4.5 | Significant, plan for cloudy days |
How Shade and Panel Angle Affect Output
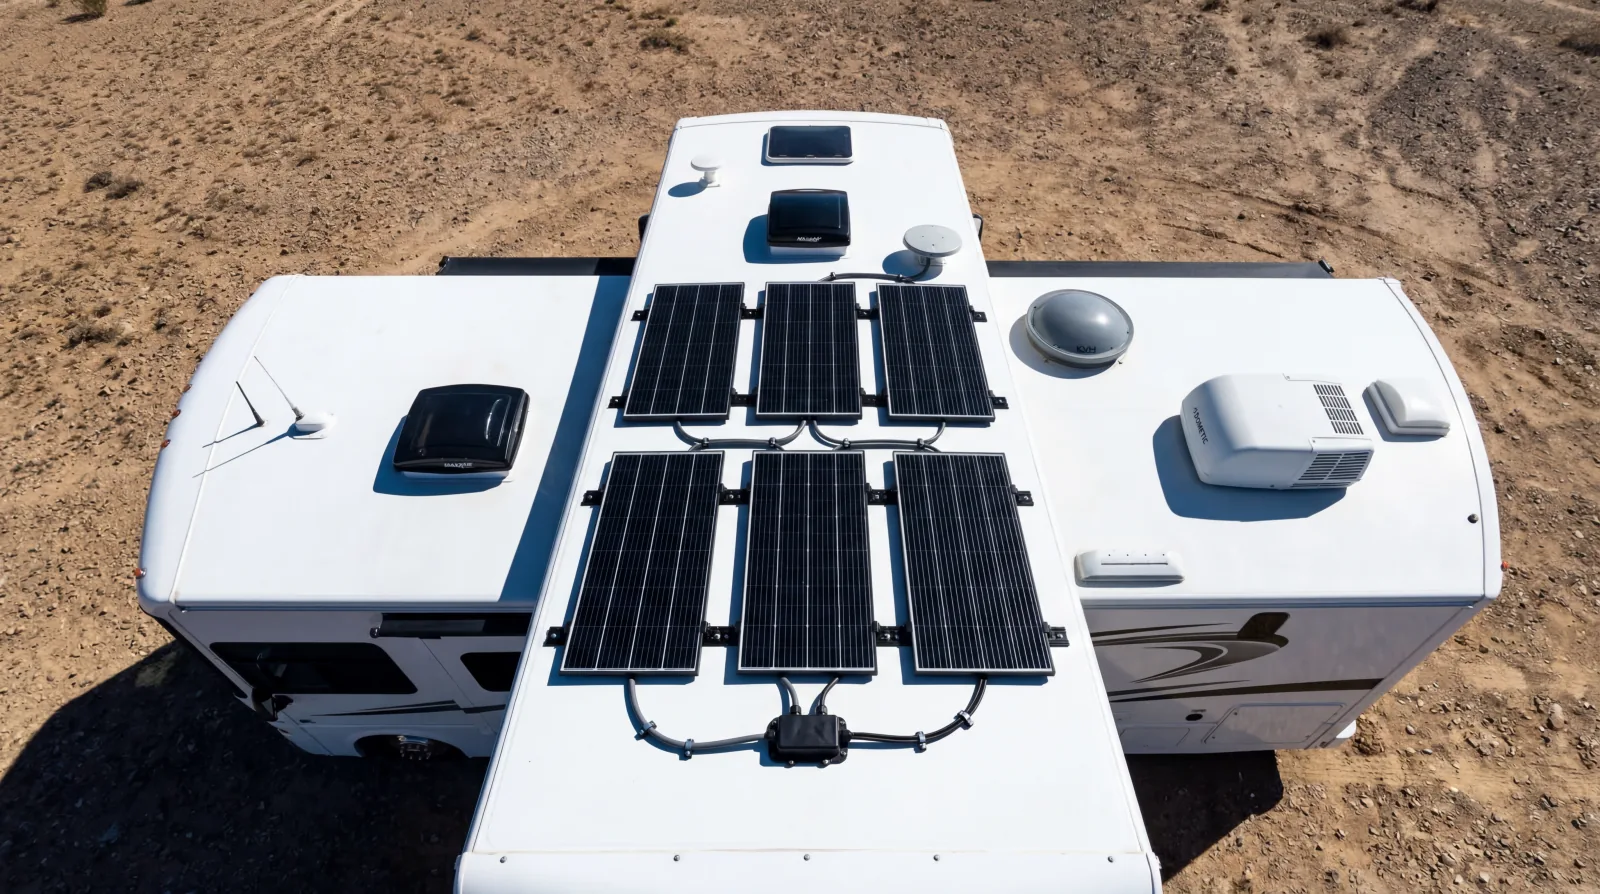
Partial shade from rooftop AC units, vents, or satellite dishes can cut panel production by up to 80%, even if only a corner of the panel is shaded.
This happens because standard panels wired in series let the weakest cell drag down the entire string. Wiring panels in parallel, or as series pairs wired in parallel, limits the loss if your roof has unavoidable obstructions.
Common Roof Obstructions That Kill Output
- •Rooftop AC unit, casts a hard shadow across adjacent panels in morning and afternoon
- •Plumbing vents and exhaust pipes, small but positioned at peak production hours
- •Satellite dish mounts, move shadow throughout the day as sun tracks
- •Roof vents and skylights, often unavoidable; map shade before mounting
Tilt Angle Makes a Bigger Difference Than Most People Realize
Tilting panels toward the sun can increase winter output by 30 to 40% compared to a flat roof mount. A common starting point is your latitude plus 15 degrees in winter and your latitude minus 15 degrees in summer.
Adjustable tilt mounts add complexity but pay off quickly in northern states. Even a fixed 15 degree tilt beats flat mounting in most of the US year round.
How to Size Your Inverter
An inverter converts your 12V DC battery power to 120V AC so you can run standard appliances.
There are two types: pure sine wave and modified sine wave. They are not interchangeable for sensitive electronics.
Pure sine wave inverters are required for CPAP machines, laptops, microwaves, and any motor driven appliance. Modified sine wave inverters are cheaper but can damage sensitive electronics and cause motors to run hot.
Our guide to choosing between pure sine and modified sine power lists exactly which appliances force the decision.
Inverter Sizing Formula
Add up the wattage of every AC appliance you plan to run at the same time. Add 20% headroom for efficiency losses and future loads.
Example: Microwave (1,200W) + coffee maker (800W) + laptop charger (100W) = 2,100W × 1.2 = 2,520W minimum inverter. A 3,000W pure sine inverter is the right choice.
Surge Rating Matters for Motor Loads
Motors, air conditioners, pumps, and compressors draw 2 to 3 times their running watts at startup. Your inverter's surge rating must handle this spike, typically for 5 to 10 seconds.
A 2,000W continuous inverter with a 4,000W surge rating handles most RV loads. If you're running a rooftop AC, pair it with a soft start kit to cut the startup surge by up to 65%.
Don't Forget Inverter Idle Draw
A typical 2,000W inverter draws 25W just being turned on with no load.
That's 600Wh per day, as much as a 12V compressor fridge uses in a full day, wasted on standby.
Use a remote switch or smart outlet to turn the inverter off when not needed.
Ships fast to get you camping sooner
Rated 4.5 of 5 on Trustpilot, checked October 2026 (opens in a new tab)Fast US shipping. Other trust signals verified October 2026.
Shop RV Solar Panels and BatteriesAffiliate link. We may earn a commission at no extra cost to you.
What Does an RV Solar System Actually Cost?
Total system cost depends heavily on battery chemistry and inverter quality. The biggest price jump is from AGM to lithium, and it's usually worth it for anyone camping more than a few weekends per year.
Budget
$800 to $1,500
100 to 200W panels with AGM batteries and a PWM or entry level MPPT controller. Best for weekend campers who don't run a fridge.
- Panels: 100 to 200W
- Battery: 100Ah AGM
- Controller: 20 to 30A PWM/MPPT
- Inverter: 500 to 1,000W modified sine
Midrange
$2,000 to $3,500
300 to 400W panels with 100 to 200Ah lithium and an MPPT controller. The sweet spot for remote workers and week long off grid stays.
- Panels: 300 to 400W
- Battery: 100 to 200Ah LiFePO4
- Controller: 40 to 50A MPPT
- Inverter: 1,000 to 2,000W pure sine
Premium
$4,000 to $7,000+
600W or more of panels with 300Ah+ lithium and a 3,000W inverter. Designed for full timers running AC and a full home office.
- Panels: 600 to 1,200W
- Battery: 300 to 600Ah LiFePO4
- Controller: 70 to 130A MPPT, or two smaller units
- Inverter: 2,000 to 3,000W pure sine
Payback period: Full timers and frequent boondockers often recoup their investment in 1 to 3 years compared to generator fuel costs and paid campground hookups. Weekend campers typically see payback in 3 to 5 years.
These figures vary based on your camping frequency, location, and equipment choices. A full timer eliminating $300 to $400 per month in hookup fees can pay off a midrange system in about a year.
Ships fast to get you camping sooner
Rated 4.5 of 5 on Trustpilot, checked October 2026 (opens in a new tab)Fast US shipping. Other trust signals verified October 2026.
Shop RV Solar Panels and BatteriesAffiliate link. We may earn a commission at no extra cost to you.

Real World Sizing: 3 RV Solar Builds
Minimal Build
Who it suits: Weekend warriors and seasonal campers who stay at campgrounds most of the time and dry camp only occasionally.
Daily loads: Phone charging (20Wh), LED lights (60Wh), 12V fan (160Wh). Total: ~240Wh per day.
- Panels: 100W monocrystalline
- Battery: 50Ah LiFePO4
- Controller: 20A MPPT
- Inverter: 500W pure sine (optional)
Estimated cost: $800 to $1,200 installed
Moderate Build
Who it suits: Remote workers and extended trippers who need a 12V fridge, laptop, Starlink, and reliable overnight power.
Daily loads: 12V compressor fridge (600Wh), laptop (240Wh), Starlink Mini for 8 hours (320Wh), lights (60Wh), phone (20Wh). Total: ~1,240Wh per day, which 400W covers at about 1,700Wh on a 5 peak sun hour day.
- Panels: 2 × 200W (400W total)
- Battery: 200Ah LiFePO4
- Controller: 50A MPPT
- Inverter: 1,500W pure sine
Estimated cost: $2,200 to $3,200 installed
Full Timer Build
Who it suits: Full time RVers living off grid for weeks at a time, running AC, a full office, and cooking appliances without hookups.
Daily loads: 12V compressor fridge (600Wh), AC (3,000Wh for 2 hrs), microwave (375Wh), laptop (240Wh), Starlink Standard for 8 hours (800Wh), lights (80Wh). Total: ~5,100Wh per day.
800W makes about 3,400Wh on a 5 peak sun hour day, so on AC days the 400Ah bank and a generator or alternator charge cover the rest.
- Panels: 4 × 200W (800W total)
- Battery: 400Ah LiFePO4
- Controller: 100A MPPT, or two 50A units
- Inverter: 3,000W pure sine
Estimated cost: $4,500 to $7,000 installed
What Limits the Size You Can Actually Fit?
The calculation gives you a number, and then the roof decides how much of it you can install.
Measure the clear space between every vent, hatch, antenna and air conditioner shroud before ordering, because a roof that looks empty rarely is.
A single vent in the wrong place can cost you a whole panel position, and shading from it costs output on the panels either side.
Panel efficiency is what buys you back that lost space, since a higher efficiency monocrystalline panel returns more watts from the same footprint.
Where the roof genuinely will not take enough, portable solar closes the gap without another roof penetration.
A folding portable panel on a lead runs out into the sun while the rig stays parked in shade, which is often worth more real off grid power than another fixed panel.
Sizing in kWh rather than watts helps here, because 400W of panel returning roughly 1.6 kWh on a good day is the figure that matters to your battery.
Work from measured energy consumption rather than nameplate ratings, since most appliances draw well under their rated figure in normal use.
Based on published panel dimensions, here is one more practical note for anyone new to RVing. Smaller 100 watt panels are easier to fit around obstructions than 200 watt panels, at the cost of more mounting hardware and more wiring joints.
Panel lifespan is not the constraint either way, because the maker warranty on quality monocrystalline states a 25 year output term, and the mounts and cables usually fail first.
Match the panels to your real power needs and your real roof, in that order.
Where the roof does take four panels, what an 800 watt array covers shows the full time load list it supports.
Putting the Whole Panel System Together
To size your solar system properly, work outward from the appliance list rather than inward from a panel count.
Start with what you need to power every day, add the losses, and only then decide how many solar panels on your RV that figure implies.
Rooftop solar carries the load for most builds, because it charges whenever the rig is parked in sun without anyone setting anything up.
Portable solar panels then cover the days you park in shade, which is exactly when a fixed array produces least.
Modern RV electrical systems make this easier than it used to be, since a single MPPT controller will happily run both a roof array and a portable lead.
At the small end, and based on published battery charge specs, 100 watts covers a trickle charge for a battery that mostly sees shore power, and no more than that.
A complete off grid power system is the panels, the controller, the battery bank, the inverter and the wiring, and undersizing any one of them limits the rest.
Size the panel system for the power you need on an average day rather than your worst day, then use shore power for the exceptions.
Battery Storage Is Half the Answer
Panels generate power only while the sun is up, so battery storage is what carries the devices and appliances through the evening.
Get the ratio wrong and the symptom is obvious: a bank that hits full by lunchtime and is flat by midnight means too little storage, not too little panel.
Lithium ion batteries in the LiFePO4 chemistry are the standard choice now, because they safely give up around 80 percent of their rated capacity.
Lead acid and AGM stop at roughly half. Based on published depth of discharge ratings, a 100Ah lithium bank does the work of roughly a 160Ah lead acid one at a fraction of the weight.
Think of batteries and solar as one energy system rather than two purchases, since neither is useful in isolation.
Most of what runs in an RV is DC power already, and every load you can keep on DC avoids the conversion loss an inverter adds.
The amount of power you can actually bank is what decides how many solar panels you need, which is why this step belongs before the panel order rather than after it.
Installing solar panels is the visible half of the job, and the storage sizing behind them is the half that decides whether it works.
You do not need a lot of hardware to start, and based on published panel output a single 100 watt solar panel with a small controller is a legitimate first step.
At the other end, and based on published appliance draw, 600 watts is roughly where an array starts to power your RV rather than assist it.
On travel days a DC DC charger, sometimes written DC to DC, will power your system from the alternator while the panels sit under cloud.
Whether going solar makes sense comes down to one question, which is how many nights a year you want to camp without a hookup.
7 Common RV Solar Sizing Mistakes
Oversizing panels without matching the battery bank
400W of panels charging a 50Ah battery will hit full charge by 10am and waste the rest of the day.
Size batteries to store at least 1.5 to 2 days of production.
Using a PWM controller above 200W
PWM controllers waste 15 to 30% of panel output compared to MPPT.
That efficiency loss compounds every day.
For any system over 200W, the MPPT price premium pays back within weeks.
Ignoring inverter idle draw
A 2,000W inverter left on standby can consume 600Wh per day doing nothing.
Install a remote cutoff switch and only power the inverter when you need AC loads.
Undersizing wire gauge
Thin wire creates resistance, which creates heat and lost watts.
Every wiring run should be sized for the maximum current it will ever carry, not the average.
When in doubt, go one gauge heavier.
Assuming rated watts equal real world watts
A 400W panel only hits 400W at STC, the standardized lab test conditions of 25°C and full strength sunlight.
On a hot summer roof, actual output drops 10 to 25% due to heat losses.
Always apply an 85% real world derating.
Mixing battery chemistries in one bank
Lithium and AGM batteries charge and discharge at different voltages and rates.
Mixing them in the same bank forces the controller to compromise on charge settings for both, which damages whichever chemistry is the odd one out.
Buying a controller with no expansion room
A 30A controller that only just matches today's 360W array becomes a bottleneck the moment you add a panel.
Size your controller for 25% more than your current panel wattage.
Always.
5 Signs Your RV Solar System Needs an Upgrade
A solar system that worked great two years ago may be struggling now. New appliances, more time off grid, or aging panels can quietly drain a bank that used to stay topped up.
- •
Batteries not reaching full charge by sunset
If your charge controller has not brought the batteries close to full by late afternoon on a clear day, that points to an array undersized for your loads.
Your controller and battery maker define what full means for your pack.
- •
Running the generator more than once a week
A generator should be a backup, not a regular fixture.
Frequent generator use means your solar is not covering your consumption.
Time to add panels or cut loads.
- •
You added new loads like Starlink, a CPAP, or an air conditioner
These are high draw appliances that can add 1,000 to 3,000Wh per day.
What worked before may no longer be adequate.
- •
Voltage drop warnings on your charge controller
Persistent low voltage alerts, especially in the morning before sun hits the panels, indicate your battery bank can no longer hold enough charge overnight.
Battery degradation or undersizing is the likely cause.
- •
Your system is more than 5 years old with no panel testing
Solar panels degrade at roughly 0.3 to 0.5% per year, but a failed bypass diode or delaminated cell can cause sudden, dramatic output drops.
Test panel output with a clamp meter at peak sun to verify rated production.
Ready to Install?
Once you have your system size, the next job is getting it on the roof. Our guide to getting panels on the roof walks through panel mounting, wiring runs, and connecting your charge controller safely.
Getting the wiring right the first time prevents the most common and most expensive solar failures.
Get the System You Just Sized
A1 SolarStore sells the parts of an RV solar system separately: full size panels from 355W up, MPPT charge controllers, RV inverters and 12V lithium batteries.
There is no boxed RV kit at A1, so use our look at how A1 sells its parts to match the panels, charge controller, wiring and mounting hardware to the sizes worked out above.
Want everything bundled? Browse our pre matched solar panel kits with controller and wiring to skip the part by part sourcing.
Browse kits matched to your system size in our RV solar panels buying guide.
Don't overlook the battery. Our best lithium batteries for RV guide compares LiFePO4 options by capacity, cold weather performance, and true cost over the battery lifetime.
Ships fast to get you camping sooner
Rated 4.5 of 5 on Trustpilot, checked October 2026 (opens in a new tab)Fast US shipping. Other trust signals verified October 2026.
Shop RV Solar Panels and BatteriesAffiliate link. We may earn a commission at no extra cost to you.
Find Off Grid Camping Spots
Now that you know your solar setup, discover 30,000+ campgrounds with RV Life Pro.
Filter by boondocking friendly locations and cell coverage.
Affiliate link. We may earn a commission at no extra cost to you.
FAQ
How many solar panels does the average RV need?
Most weekend campers get by with 200 to 400W.
Travelers running a laptop and 12V fridge typically need 400 to 600W.
If you run an air conditioner on solar, budget 800W or more, and treat a generator or shore power as part of the plan.
What is a good battery bank size for a 200W solar system?
Pair 200W of panels with at least 100Ah of lithium (or 200Ah of AGM at 50% depth of discharge).
That gives you roughly 1,000 to 1,200Wh of usable storage, enough for lights, phone charging, and a fan overnight.
Does panel wattage matter more than battery capacity?
Both matter equally.
Panels determine how fast you recharge; batteries determine how long you can run without sun.
Skimping on either creates a bottleneck.
Can I add more panels later?
Yes, if your charge controller has headroom.
Size your controller for 25% more capacity than your current panels so expansion is plug and play rather than a full swap.
Should I add a DC to DC charger alongside solar?
Often yes.
A DC to DC charger draws power from your engine alternator while you drive and charges the house battery safely.
Solar tops the bank up while you are parked, and the alternator refills it on travel days when the sky is overcast.
A 20 to 40A DC to DC charger suits most rigs, and it also protects a lithium bank from an alternator that was never designed to charge lithium directly.
Can RV solar panels run an air conditioner?
Yes, but it requires a large system.
A standard 13,500 BTU RV air conditioner draws 1,300 to 1,500W, so 800W or more of panels is the minimum, 300Ah+ of lithium batteries, and a 2,000W pure sine inverter at minimum.
Many full timers pair solar with a soft start kit to reduce the startup surge.
How many solar panels do I need to run a Starlink on my RV?
Starlink's own specification sheets put the Standard kit at 75 to 100W and the Mini at 20 to 40W on average.
A Mini run 8 to 10 hours a day uses about 160 to 400Wh, which roughly 100W of extra panel and 50Ah of extra lithium covers.
A Standard kit left on 24 hours uses 1,800 to 2,400Wh, which needs about 425 to 565W of extra panel if you assume 5 peak sun hours.
Is 200 watts of solar enough for an RV?
For a minimal setup, phone charging, LED lights, and a small fan, yes.
If you add a 12V fridge, laptop, or any AC appliances, 200W will fall short.
Most campers with a refrigerator need at least 300 to 400W.
What is the difference between a 12V and 24V RV solar system?
A 24V system uses thinner wire for the same power transfer, runs cooler, and is more efficient at higher wattages.
Most RVs under 400W run 12V for simplicity; systems above 600W benefit from 24V to reduce wiring losses and inverter heat.
Do RV solar panels work on cloudy days?
Yes, but output drops to roughly 10 to 25% of rated wattage on overcast days.
Monocrystalline panels perform better in diffuse light than polycrystalline.
Oversizing your panel array by 30 to 50% is the most reliable hedge in consistently cloudy regions.
How long do RV solar panels last?
According to the output warranties panel makers publish, quality monocrystalline panels typically produce 80% or more of rated power after 25 years.
Degradation averages 0.3 to 0.5% per year.
Physical damage, delamination, or a failed junction box are more common failure points than cell degradation.
Can I mix different wattage solar panels on my RV?
You can, but mismatched panels wired in series will limit output to the weakest panel.
Wiring mixed panels in parallel avoids that problem but requires careful string planning.
Ideally, use identical panels from the same manufacturer for the simplest, most efficient setup.
What size wire do I need for RV solar panels?
Panel to controller runs typically use 10 AWG for up to 30A and 8 AWG for up to 50A.
Controller to battery runs should be kept short and sized at least one gauge heavier than the panel wiring.
Always use stranded copper wire rated for outdoor UV exposure.
How much solar power do I need for full time RV living or a 40 ft camper?
Full time living is the point where a small array stops being enough power, because the fridge runs every day of the year rather than for a long weekend.
A 40 ft camper usually carries a residential fridge, a larger water pump and more lighting, so plan on 600W to 800W of panel and 400Ah or more of lithium, based on published appliance specs.
The length of the rig matters less than the appliance list, so size the solar power system from your own daily watt hours rather than from the floor plan.
Is 400W of solar enough for an RV, and can it run a fridge?
400W is comfortably enough power to run a 12V compressor fridge, which is the single most common question asked of any RV solar power system.
Based on published compressor fridge specs, a typical unit draws somewhere between 300 and 600 watt hours a day, and 400W of panel in reasonable sun returns well above that.
Where 400W falls short is high draw appliances such as an air conditioner or a microwave, which need shore power, a generator or a far larger system.
How do I calculate my RV's daily energy needs for solar sizing?
List every device in the electrical system, multiply each one's watts by the hours you run it, and add the results to get daily watt hours.
Based on typical published conversion losses, add roughly 20 percent headroom for cloudy days and for losses in the wiring and the charge controller.
Then divide by the usable sun hours where you camp to get the panel wattage.
Do this before you buy anything.
Sizing power systems from a real appliance list is the difference between a rig that lasts a week off grid and one that hunts for shore power every second night.
Does solar replace shore power completely?
For most travelers solar reduces how often shore power is required rather than removing it entirely.
A correctly sized array covers lights, pumps, devices and a compressor fridge indefinitely in decent sun, which is the bulk of normal use.
Air conditioning, electric heating and long spells of poor weather are the cases where shore power or a generator still earns its place in the electrical system.
Smart RV Hub Editorial Team
RV Technology Research and Reviews
Our writers research smart RV technology full time, covering solar power, connectivity, security, and power management.
Every guide draws on published manufacturer specifications and verified owner reviews, so you can compare options with confidence.
Meet the editorial team and our review standardsExplore Solar Parts Sized for Your RV
A1 SolarStore carries camper panels from 355W up, 12V lithium batteries, MPPT charge controllers and RV inverters as separate parts.
Rated Excellent on Trustpilot Trustpilot (verified October 2026) with free shipping on qualifying orders and expert support to help you choose the right components.
Shop RV Solar Panels at A1 SolarStoreAffiliate link. We may earn a commission at no extra cost to you.
Know your number already? Jump straight to the 200 watt kit or the 400 watt build to see what each includes and which to buy.
Planning to power air conditioning? Check how much solar it takes to run an RV air conditioner before you finalize your array size.
Once you have a wattage in mind, price the full build with the estimator that totals panels, battery and wiring. Then browse the latest RV solar equipment discounts to buy your components at the best price.
Still weighing the decision? Our honest math on cost versus campground savings breaks down exactly when the investment pays off based on your camping frequency.
Prefer not to drill the roof at all? Our comparison of portable suitcase kits and roof mounted systems works through the trade off before you size anything.
When you are ready to purchase, see our shortlist of all in one kits for pre matched complete systems.
Choosing where to order from matters as well, and our page on where A1 SolarStore fits for RV owners walks through the catalog and the support behind it.
Browse our other solar guides for the rest of the setup.
Sizing a system for life off the grid?
Learn the basics in our introduction to camping without hookups, then put the panels to work on Harvest Hosts overnight parking at wineries and farms. After that, map a solar powered route with the trip planning steps that cover fuel and campsites.
Add Me to The Unplugged RV Waitlist
The Unplugged RV walks a beginner through living off grid: sizing power, carrying water and finding places to stay.
No release date yet. Join and you hear first when it is ready.